Mi caso a la hora de actualizar el Nexus de forma manual, como el de muchos, es algo especial puesto que no dispongo de un sistema windows tipo PC. Bueno, sí dispongo, pero siempre intento hacer todo desde la virtualización con mi Mac. Antes las cosas eran más difíciles, pero la compatibilidad de los drivers actuales lo hace todo más sencillo.
Las instrucciones generales para la actualización manual de un Nexus a Lollipop se pueden leer en la página oficial de Desarrolladores de Google, donde se encuentran las imágenes de descarga para cada terminal. Yo tenía el Nexus 5 rooteado, con el Kernel Franco y Xposed framework operativo en mi versión de Kit Kat 4.4.4. Antes de nada, probé a actualizar vía OTA. Lo primero es desinstalar todo lo relacionado con Xposed, desactivando módulos y desinstalando. Luego, por si acaso y para partir de una instalación limpia, hice un reset de fábrica al terminal. Aún así, el kernel seguía siendo Franco y en el momento de actualizar, el error estaba ahí.

Así que tocaba actualizar de forma manual. Y ahí fue donde tuve que echar mano de la máquina virtual y poner la paciencia en mi mano derecha como aliada. Instalar todo lo correspondiente al SDK son unas cuantas gigas de datos y no es recomendable hacerlo con prisas.
Una vez todo listo, conectando el terminal por USB en modo fastboot (encendiendo el móvil apretando a la vez botón de volumen arriba+botón de volumen abajo+ botón de encendido) y siguiendo las instrucciones básicas de darle a flashear todo con flash-all.bat, surgió el siguiente error (o algo similar):
target reported max download size of 1073741824 bytes
archive does not contain ‘boot.sig’
archive does not contain ‘recovery.sig’
failed to allocate 1005154516 bytes
error: update package missing system.img
Press any key to exit…
Pongo a continuación el proceso de flasheo manual descrito por Google:
Flashing Instructions
To flash a device using one of the system images below (or one of your own), you need the
fastboottool. You can get thefastboottool either:
- From a compiled version of the the Android Open Source Project.
- Or, from the
platform-tools/directory in the Android SDK. Be sure that you have the latest version of the Android SDK Platform-tools from the SDK Manager.Once you have the
fastboottool, add it to yourPATHenvironment variable (theflash-allscript below must be able to find it). Also be certain that you’ve set up USB access for your device, as described in the Using Hardware Devices guide.Caution: Flashing a new system image deletes all user data. Be certain to first backup any personal data such as photos.
To flash a system image:
- Download the appropriate system image for your device below, then unzip it to a safe directory.
- Connect your device to your computer over USB.
- Start the device in fastboot mode with one of the following methods:
- Using the adb tool: With the device powered on, execute:
adb reboot bootloader- Using a key combo: Turn the device off, then turn it on and immediately hold down the relevant key combination for your device. For example, to put a Nexus 5 (“hammerhead”) into fastboot mode, press and hold Volume Up + Volume Down + Power as the device begins booting up.
- If necessary, unlock the device’s bootloader by running:
fastboot oem unlockThe target device will show you a confirmation screen. (This erases all data on the target device.)
- Open a terminal and navigate to the unzipped system image directory.
- Execute the
flash-allscript. This script installs the necessary bootloader, baseband firmware(s), and operating system.Once the script finishes, your device reboots. You should now lock the bootloader for security:
- Start the device in fastboot mode again, as described above.
- Execute:
fastboot oem lockLocking the bootloader does not wipe any data, but when you want to flash it again, you must run
fastboot oem unlockagain, which will wipe the data.
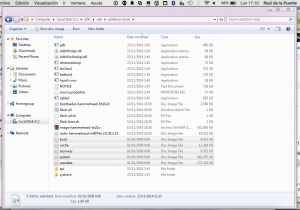
La solución ante ese problema de memoria es simple: descomprimir también el archivo de la imagen de Lollipop (en Nexus 5 GSM sería el archivo “image-hammerhead-lrx21o.zip”), asegurarse de tener todo descomprimido en la carpeta “platform-tools” del SDK y ejecutar desde esa carpeta en línea de comandos (cmd) las siguientes órdenes una a una (en la referente al flasheo de la imagen, paciencia. Id a tomar algo. Tarda mucho. Lo justo y necesario para desesperarse pensando que va mal):
fastboot flash bootloader bootloader-hammerhead-hhz12d.img
fastboot reboot-bootloader
fastboot flash radio radio-hammerhead-m8974a-2.0.50.2.21.img
fastboot reboot-bootloader
fastboot flash system system.img
fastboot reboot-bootloader
fastboot flash userdata userdata.img
fastboot flash recovery recovery.img
fastboot flash boot boot.img
fastboot erase cache
fastboot flash cache cache.img
fastboot reboot

Durante todo el proceso el terminal debe quedarse en modo fastboot. Y con el último comando el terminal empezará a iniciar Lollipop. Paciencia también, que estará unos minutos hasta que aparezcan las palabras Android. Lo mejor es no prestar atención al terminal.
Y listo. La forma más manual de actualizar el Nexus 5 a Lollipop de una manera limpia y con máquina virtual.
De todas formas, para los que les guste ver las cosas en vez de leerlas, aquí os dejo uno de los vídeos en español sobre cómo actualizar a mano el terminal Nexus. Explica la forma tradicional de Google con flash-all.bat. Pero, repito, si os falla como me pasó a mí…ya sabéis qué hacer.
